Single Sign-On (SSO)
Organizations can let members sign in to Ordify with their existing identity provider. Ordify supports SAML 2.0 and OpenID Connect (OIDC), and organization admins can configure it themselves — no support ticket required.
Once configured, anyone whose email address matches one of your verified domains signs in through your identity provider instead of with an Ordify password.
Who can configure SSO
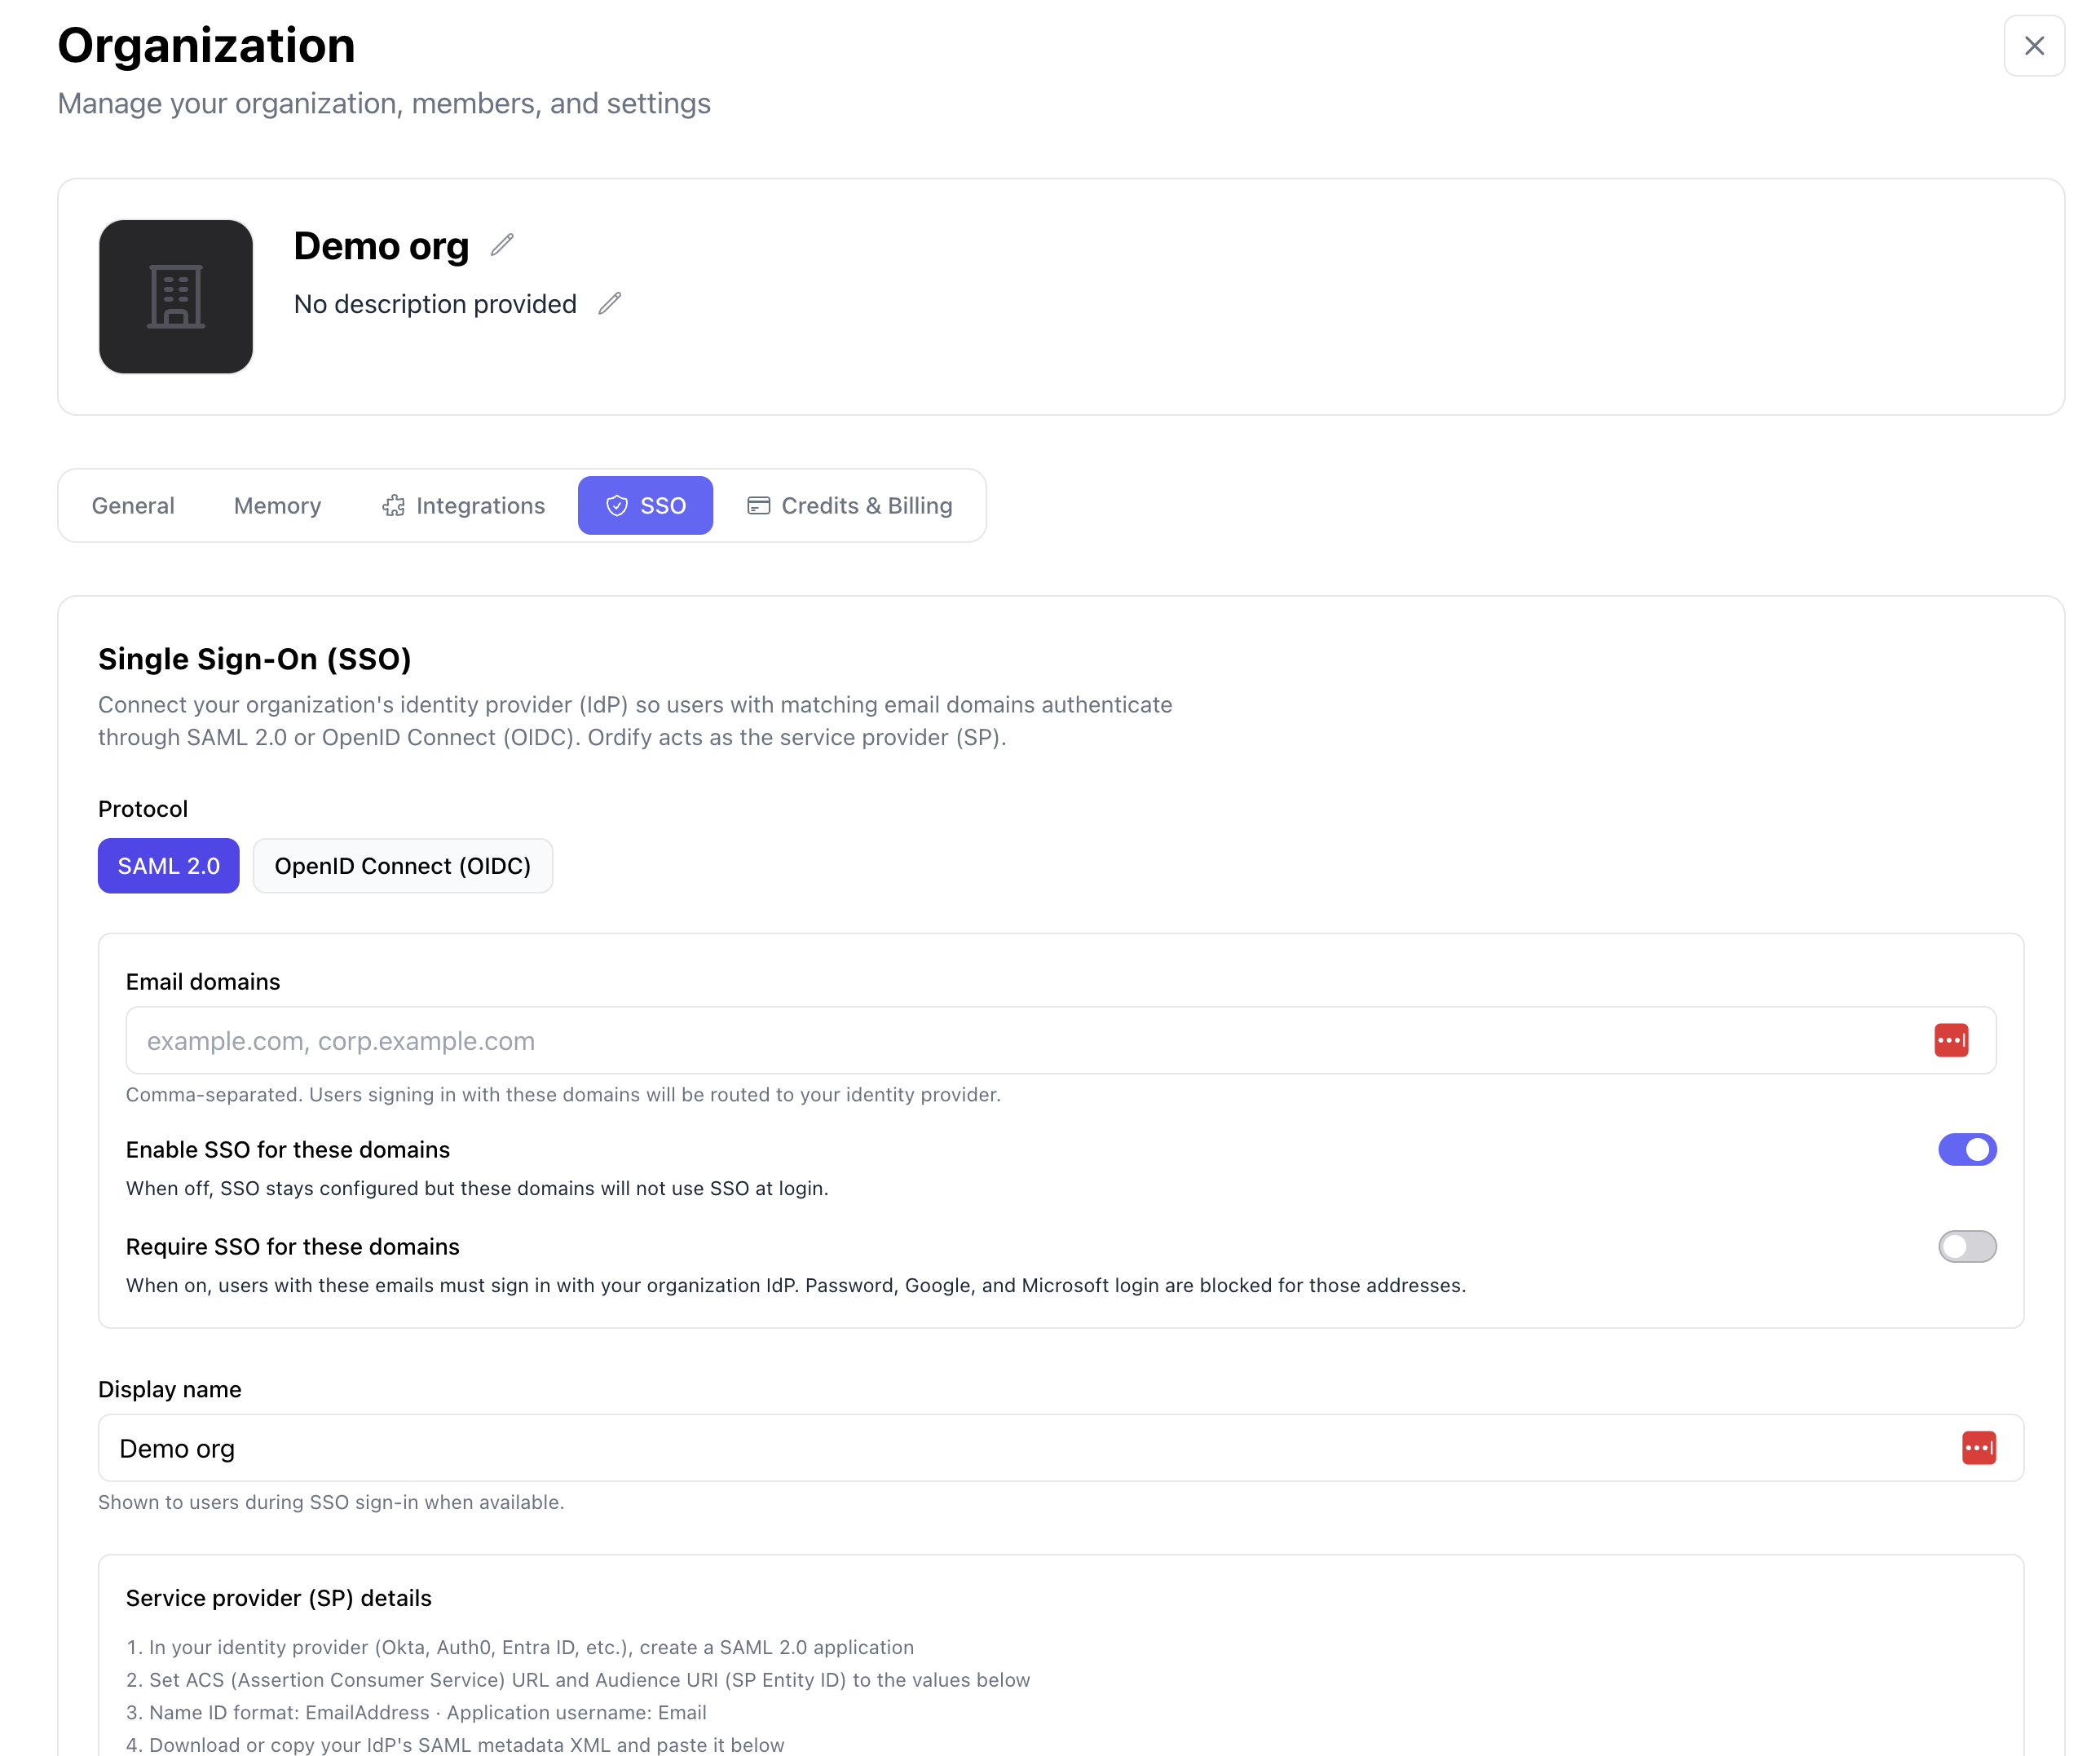
Only organization admins can view or change SSO settings. Configuration lives in Organization Settings → SSO.
Before you start
You will need:
- Admin access to your identity provider (Okta, Entra ID, Auth0, Google Workspace, or any SAML 2.0 / OIDC provider)
- The email domains your organization owns (for example
example.com,corp.example.com)
Setting up SAML
Step 1: Add your email domains
In Organization Settings → SSO, enter the domains that should use SSO under Enable SSO for these domains. Separate multiple domains with commas.
Step 2: Configure your identity provider
Ordify shows the two values your IdP needs. Copy them from the SSO tab — each has a copy button:
- ACS (Assertion Consumer Service) URL — where your IdP posts the SAML assertion
- Audience URI (SP Entity ID) — how your IdP identifies Ordify
Create a new SAML application in your identity provider and set these two values.
If your IdP already has an entity ID configured for Ordify that you cannot change, you can override the Audience URI in the SSO tab so it matches what your IdP expects, rather than reconfiguring the IdP.
You can also download Ordify's SP metadata XML from the SSO tab and import it into your IdP if it supports metadata import.
Step 3: Paste your IdP metadata
Copy the SAML metadata XML from your identity provider and paste it into the metadata field in Ordify.
Step 4: Save
Give the connection a display name — this is what members see on the login screen — then click Save SSO configuration.
Setting up OIDC
For OpenID Connect, provide:
- Issuer URL — for example
https://your-tenant.okta.comorhttps://your-tenant.us.auth0.com/ - Client ID
- Client secret
Ordify also shows a Callback URL to register as a redirect URI in your identity provider.
The issuer must use HTTPS. When updating an existing OIDC configuration, leave the client secret blank to keep the current one.
Requiring SSO
By default, enabling SSO gives members the option to sign in through your identity provider. To make it the only way in, turn on Require SSO for these domains.
With Require SSO on, anyone with an email address on those domains must sign in with your identity provider. Password, Google, and Microsoft login are all blocked for those addresses.
Confirm at least one member can sign in successfully through SSO before turning on Require SSO. If the identity provider configuration is wrong, members on those domains will not be able to sign in at all.
You must add at least one email domain before Require SSO can be enabled.
Existing accounts
Members who already have Ordify accounts keep them. The first time someone signs in through SSO, their identity provider account is linked to their existing Ordify user, so their agents, jobs, and history carry over.
Changing or removing SSO
- Switch protocols — use Replace with SAML or Replace with OIDC to move between them
- Turn it off — disable SSO for the domains while keeping the configuration for later
- Remove it — delete the configuration entirely
If Require SSO is on, turn it off before removing the configuration so members are not locked out.
What's next
- Organization app access — control which integrations your organization can use
- Credits & usage limits — manage your organization's shared credit pool