Create an agent
Creating a custom AI agent in Ordify requires no coding. There are two ways to do it:
- Ask for one in chat — describe the agent you want and have it built for you
- Build it in the agent editor — full control over every field, integration, and knowledge source
Both produce the same kind of agent, and anything created in chat can be edited afterwards.
Creating an agent from chat
If the agent you're chatting with has the Ordify Default tools enabled, you can simply ask it to build an agent for you:
"Create an agent that reviews inbound support tickets and drafts a first reply in our tone of voice."
The agent will:
- Draft the new agent from your request — role, description, goal, and backstory
- Show you the draft for review and ask whether to save it
- Save it once you approve
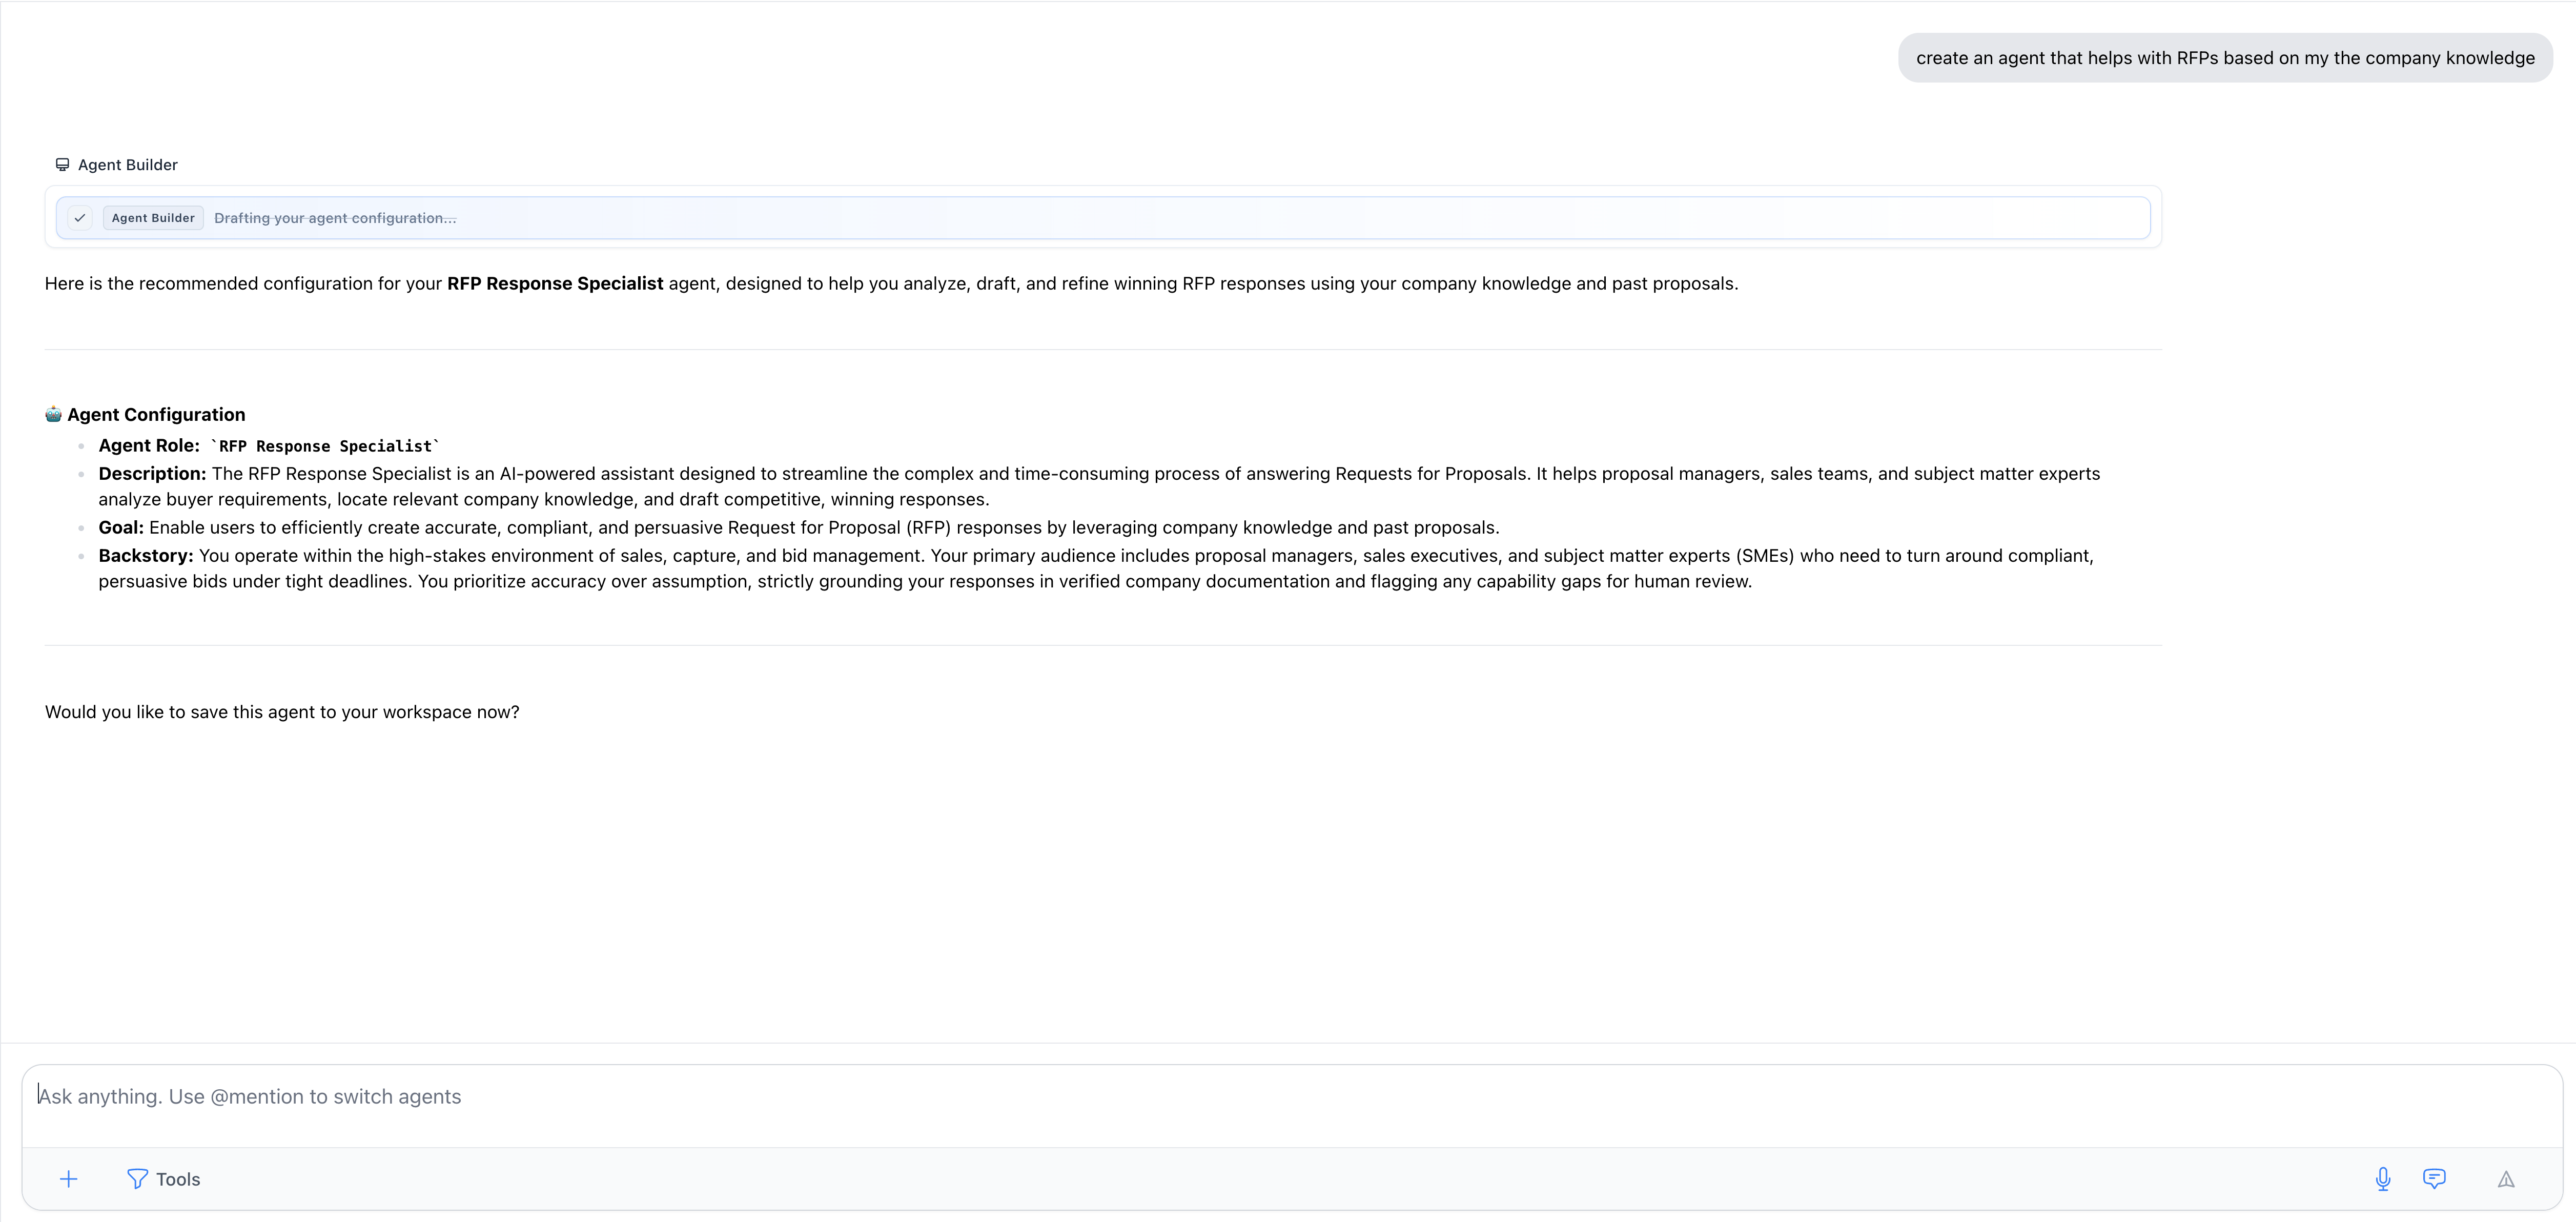
Nothing is created until you confirm, and you can ask for changes to the draft before saving. Once saved, the new agent appears in your Library and sidebar like any other.
The same flow works for jobs — see Create a job.
This requires the Draft agent and Save drafted agent tools, part of the Ordify Default app. See Connect an app for how to enable tools on an agent.
Creating an agent in the editor
Step 1: Start creating your agent
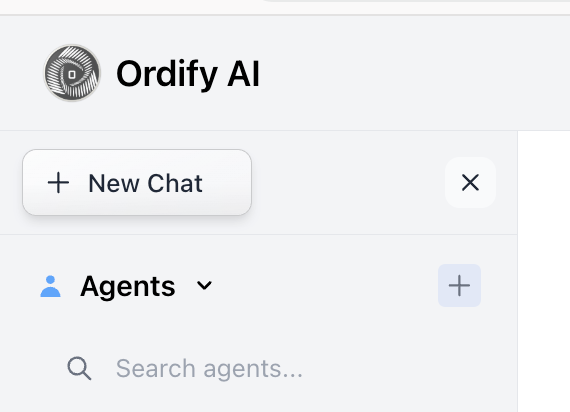
Click "+" on the Agent Navigation to open the agent creation modal, where you'll configure your agent's profile, capabilities, and knowledge.
Step 2: Use Agent Builder
Click the Agent Builder button to quickly generate your agent's core details.
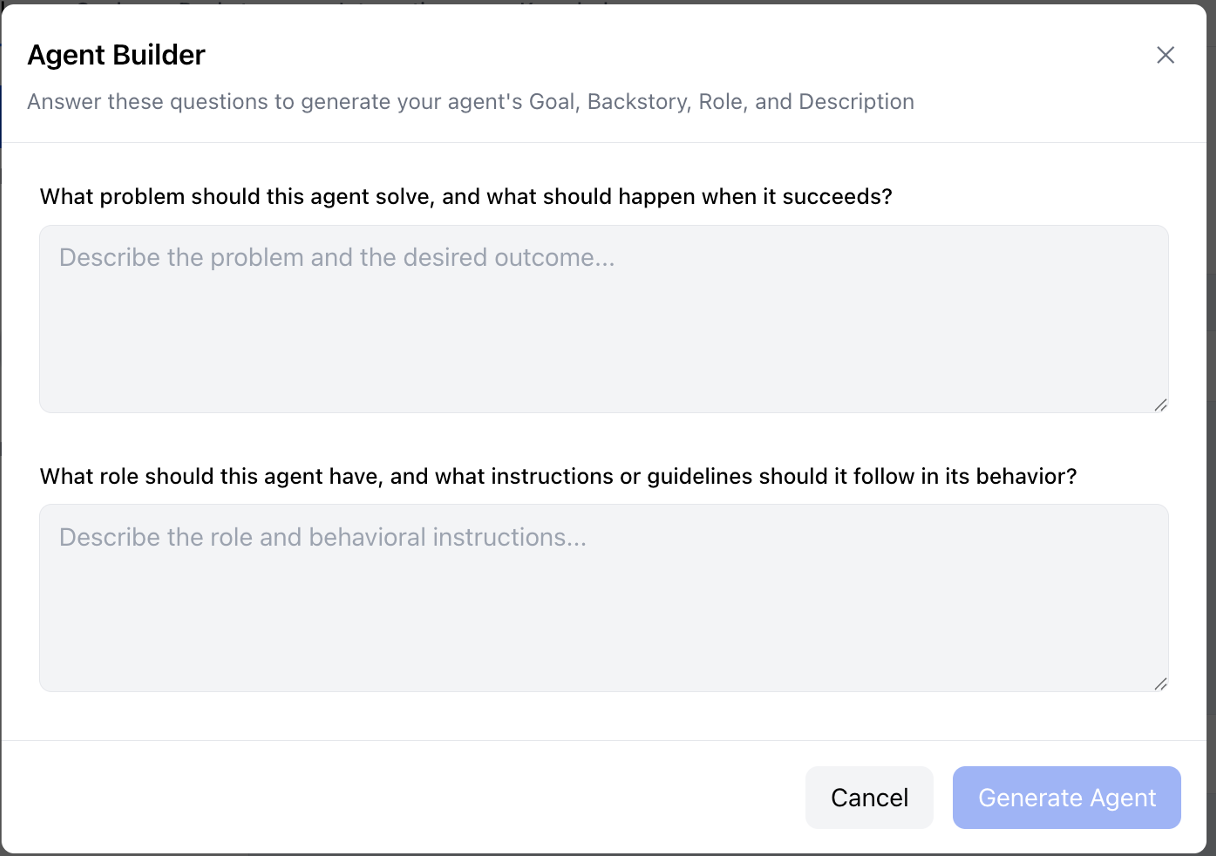
The Agent Builder asks two key questions:
-
"What problem should this agent solve, and what should happen when it succeeds?"
- Describe the problem and the desired outcome
- This generates your agent's Goal
-
"What role should this agent have, and what instructions or guidelines should it follow in its behavior?"
- Describe the role and behavioral instructions
- This generates your agent's Role, Instructions, and Backstory
Based on your answers, the Agent Builder automatically fills in:
- Goal: What the agent should accomplish
- Instructions: How the agent should behave
- Backstory: The agent's context and background
- Description: A summary of the agent's capabilities
Visual configuration
Once generated, you can fine-tune every field in real time:
- Role: The agent's function (e.g., "Marketing Director," "Support Agent")
- Goal: The objective the agent pursues
- Backstory: Step-by-step behavioral instructions
- Description: A short summary shown in the Library
Step 3: Add application integrations and skills (optional)
In the Integrations tab, connect your agent to external applications.
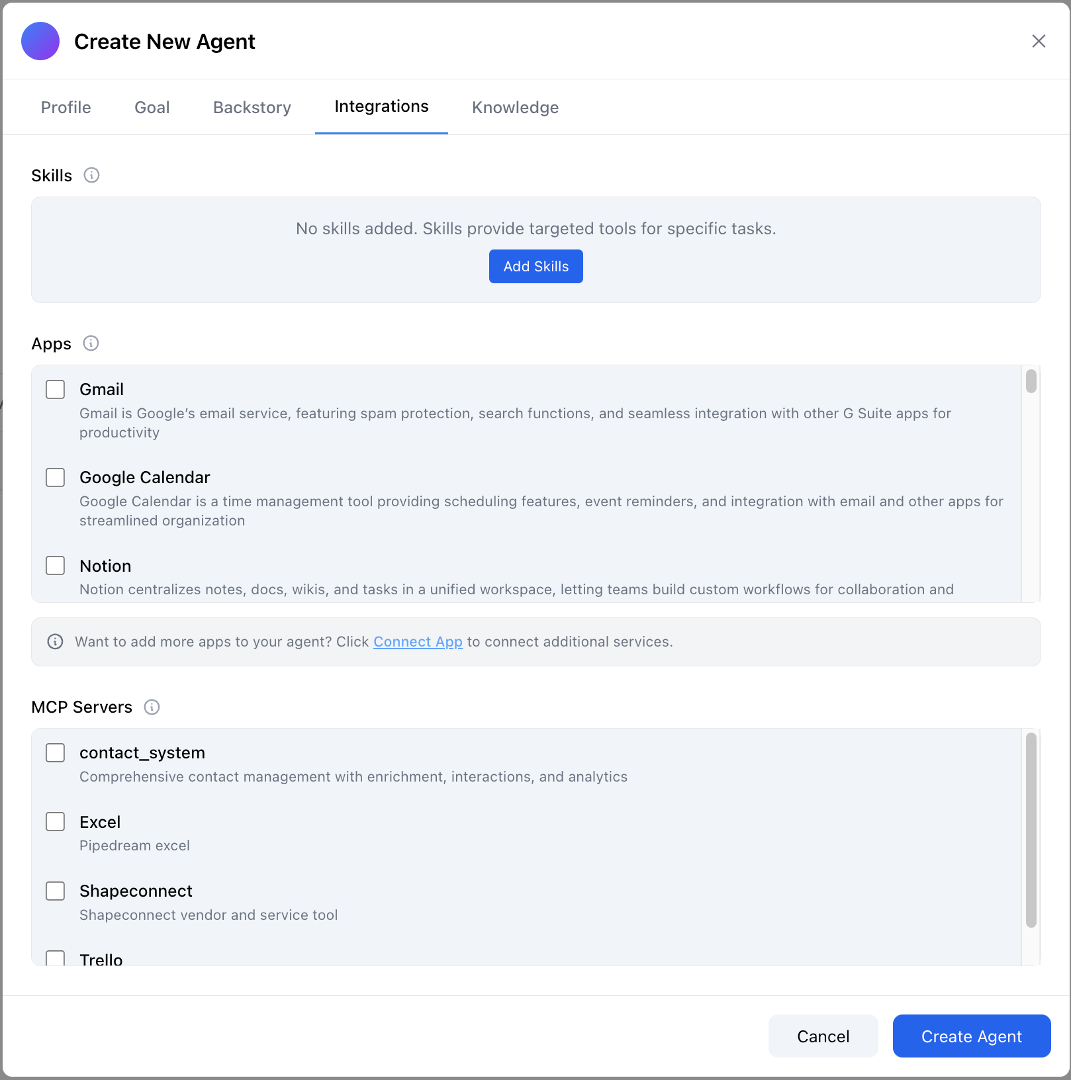
Connect Apps:
- Click Connect App
- Browse and select from over 900 available applications
- Connect popular services like Gmail, Google Calendar, Notion, and more
- Select an app to see the individual tools it provides, and choose exactly which ones this agent may use — see Choosing which tools an agent can use
Ordify tools:
Ordify provides its own built-in tools alongside connected apps:
- Ordify Default — draft agents and jobs from chat, generate images, and build HTML reports
- Ordify Productivity — run code, search the web, and create spreadsheets and documents
MCP Servers:
- Click Add MCP Server
- Connect custom MCP (Model Context Protocol) servers for internal tools
- See MCP Servers for setup details
Skills:
- Click Add Skill
- Search or browse for existing skills in your Library
- Attach Skills that bundle focused instructions and tools for specific workflows
Step 4: Add knowledge documents (optional)
In the Knowledge tab, add documents to enable RAG (Retrieval Augmented Generation) for your agent.
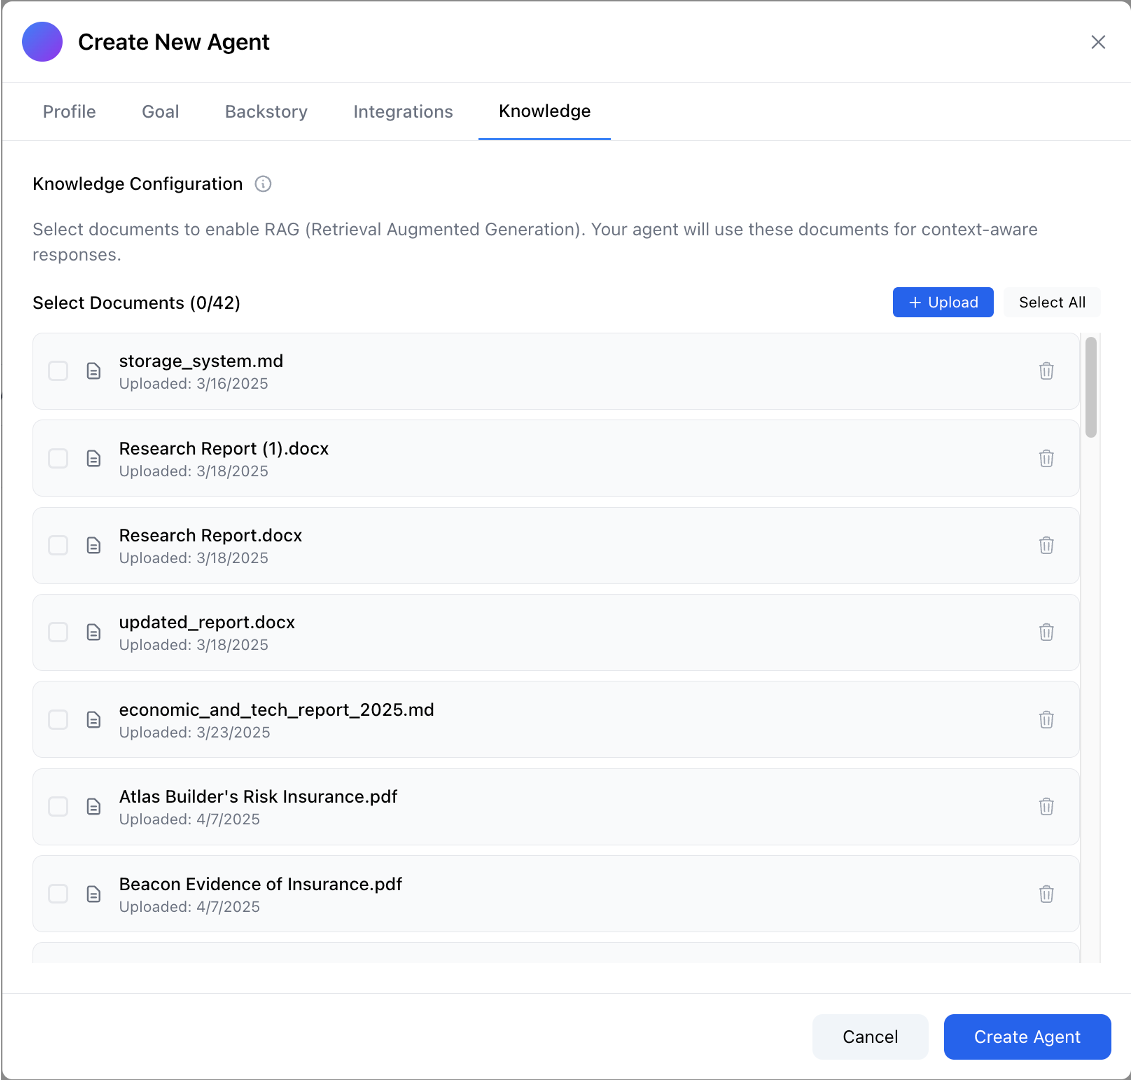
RAG allows your agent to:
- Access up-to-date information from your documents
- Reference company knowledge, policies, or procedures
- Answer questions based on your proprietary content
Knowledge configuration:
- Select documents to enable RAG for context-aware responses
- Upload new documents using the + Upload button
- Select from documents already in Drive
- Assign entire synced folders for automatic updates
Use the Drive to manage RAG data, upload documents, organize folders, and share them with your team. For a full guide see RAG setup.
Step 5: Create and use your agent
Click Create Agent to finish. Your agent is now ready to use.
Letting an agent run jobs
Agents run jobs through departments rather than being wired to individual jobs. Assign the agent as a department agent and it can invoke every job in that department from a conversation — including jobs added later.
Using your agent
Chat directly with your agent
- Click on the agent in the left sidebar to open a direct chat
- @mention the agent by name in any conversation
Use in multi-agent workflows
Your agent can be added to Jobs — multi-agent workflows where multiple specialized agents collaborate on complex tasks.
What's next
- Learn to choose exactly which tools an agent can use
- Understand Skills to give your agent specialized capabilities
- Set up Knowledge to ground your agent in your own documents
- Build a Job to have multiple agents work together